Seeing the bleed area
BesvartHi, how can you see the bleed area?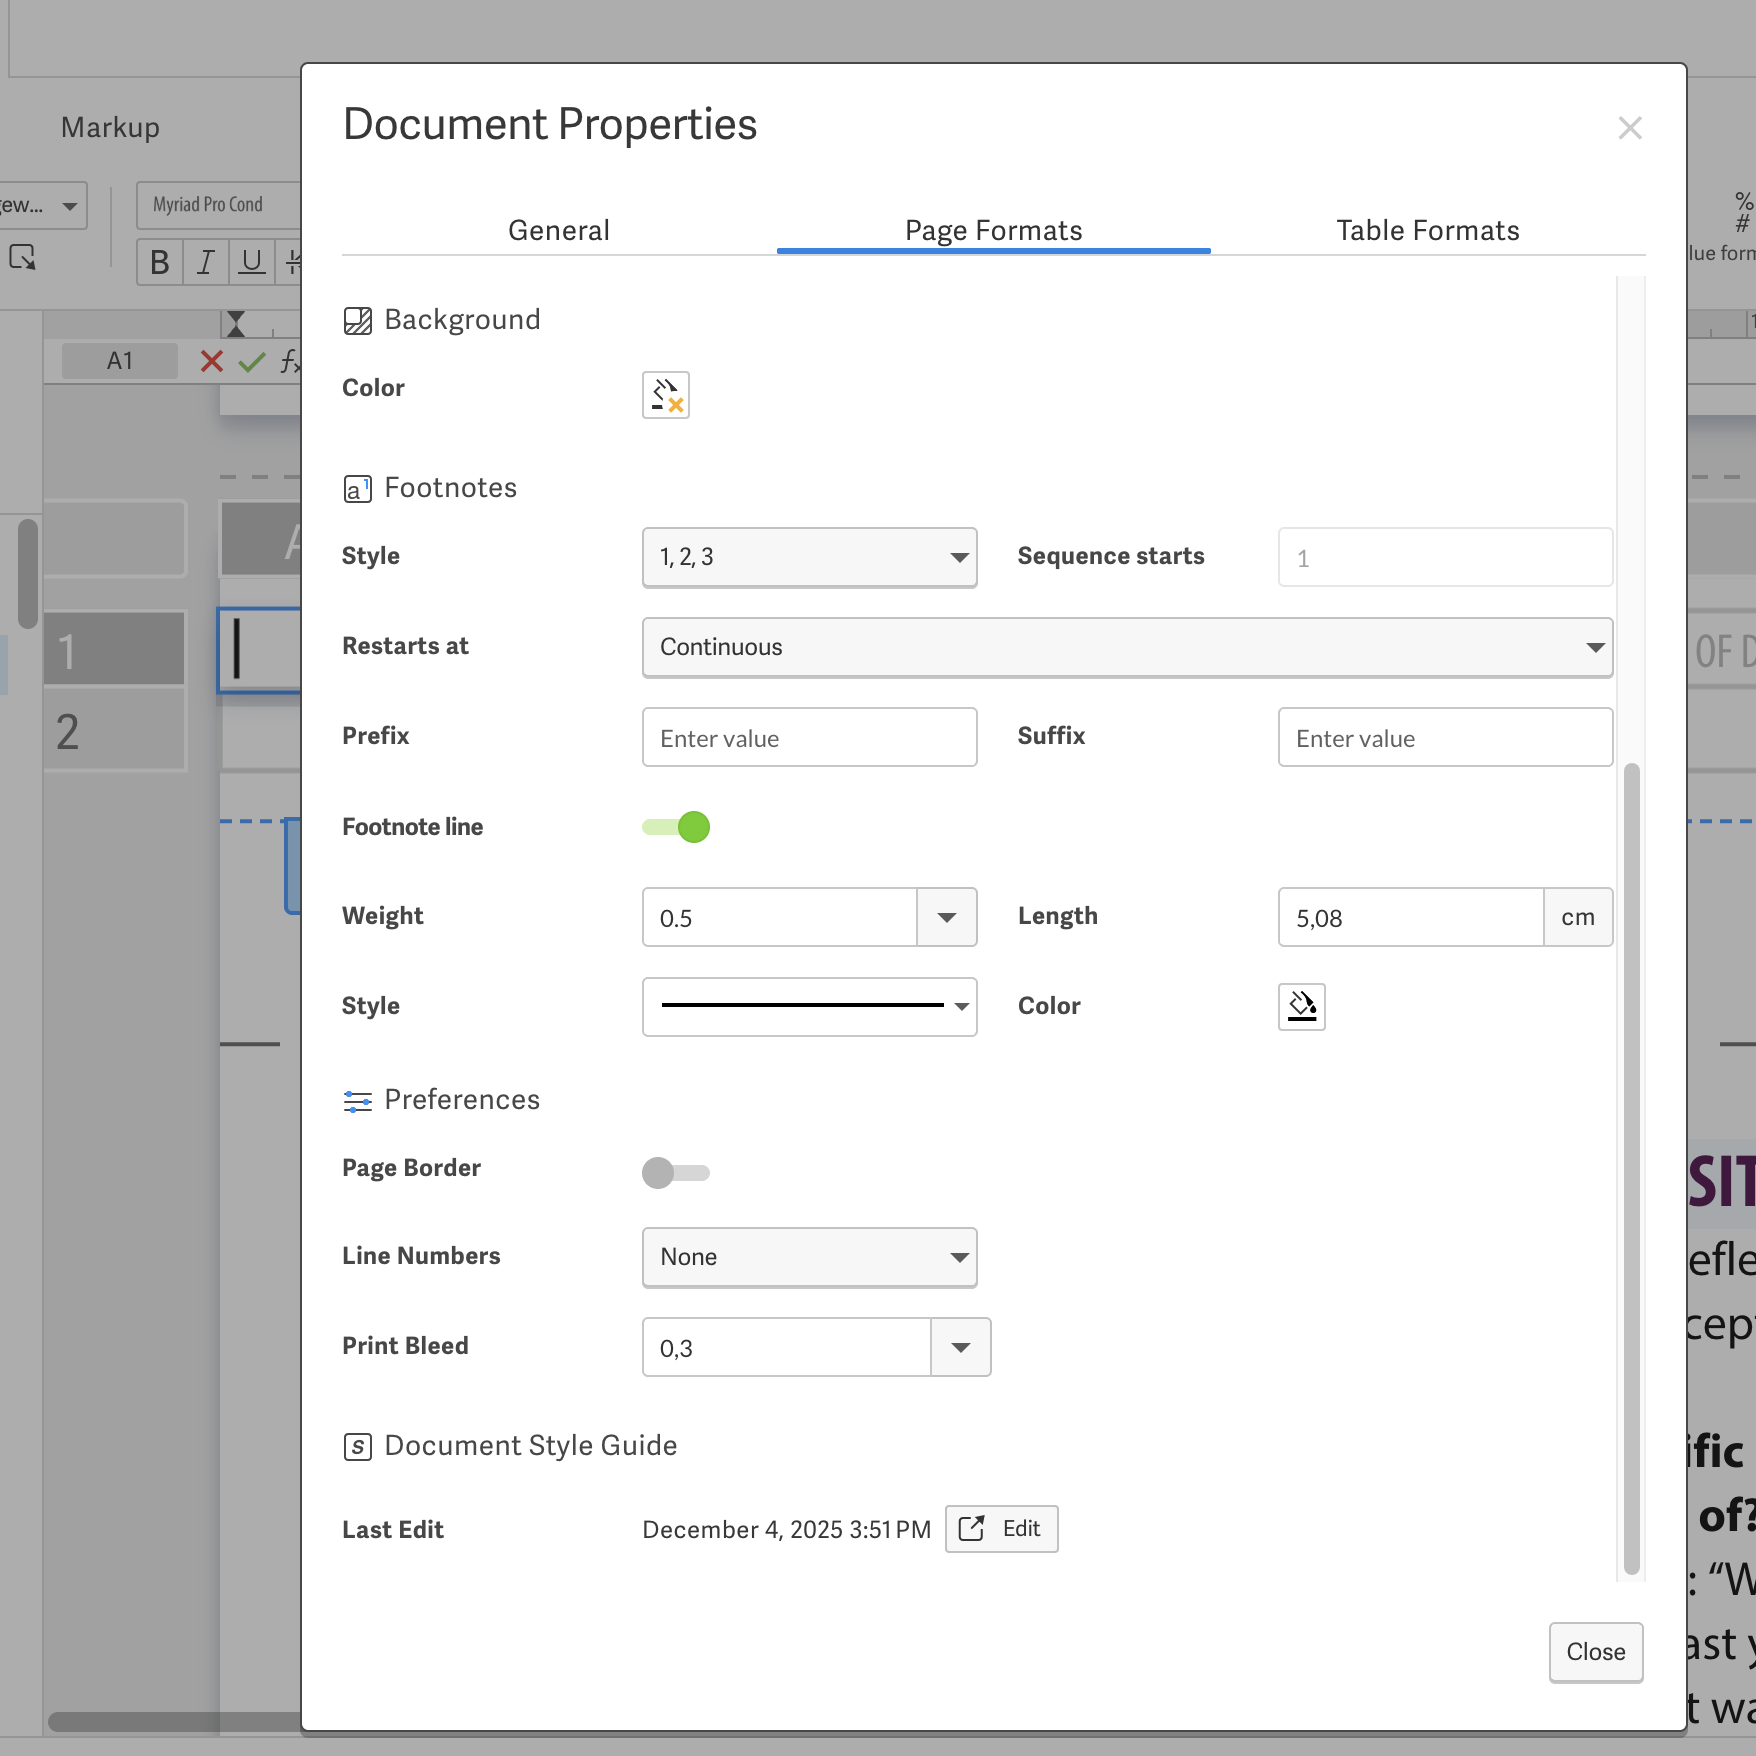
0
-
 Hi Janne Geelen,Happy to help you see and enable the bleed area in Designed Reporting. The good news is you're in the right spot!1. Enable Bleed in a Document:
- Go to the Edit tab and click on Properties.
- Select Document and navigate to the Page Formats tab.
- In the Preferences section, set a value for Print Bleed.
- Save the changes. 3. Snap Objects to Bleed:
- When a bleed value is set, dragging an object outside the page will temporarily show the bleed snap-guideline. 4. Exporting with Bleed:
- You can export your document as a PDF with bleed. The exported document will include crop marks and a white border. For additional details, you can refer to the Workiva support article on Using Print Bleed.0Logg på for å legge inn en kommentar.
Kommentarer
1 kommentar